Upgrade Ingram Subscription from IDSync 3.10 to IDSync 4.1
If you purchased IDSync’s PSA Billing solution from Ingram Micro in 2016 or early 2017, check your version. If it displays 3.10.xx rather than 4.1.xx, then it is time to upgrade. Due to system and compatibility limitations, version 3.10 of IDSync is now considered a legacy branch of the IDSync family of products. What that means is that IDSync will no longer be integrating new features into the 3.10 product line. This guide will step you through the process of changing your IDSync subscription on the Ingram Marketplace.
Step-by-step guide
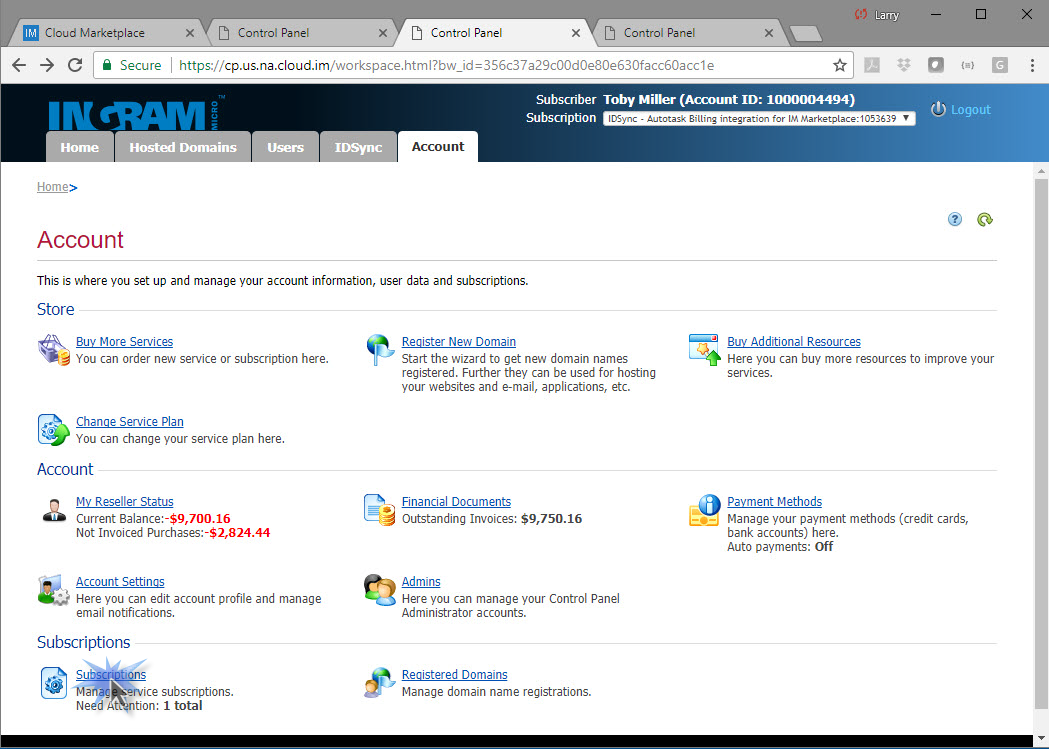
- The 3.10 and 4.1 branches of IDSync are sold on different subscriptions on Ingram Micro, so the first step is to cancel your current IDSync Billing Subscription. To do so, log into the My Subscriptions control panel in the Ingram Marketplace. Then go to account the account tab and select the Subscriptions menu option:
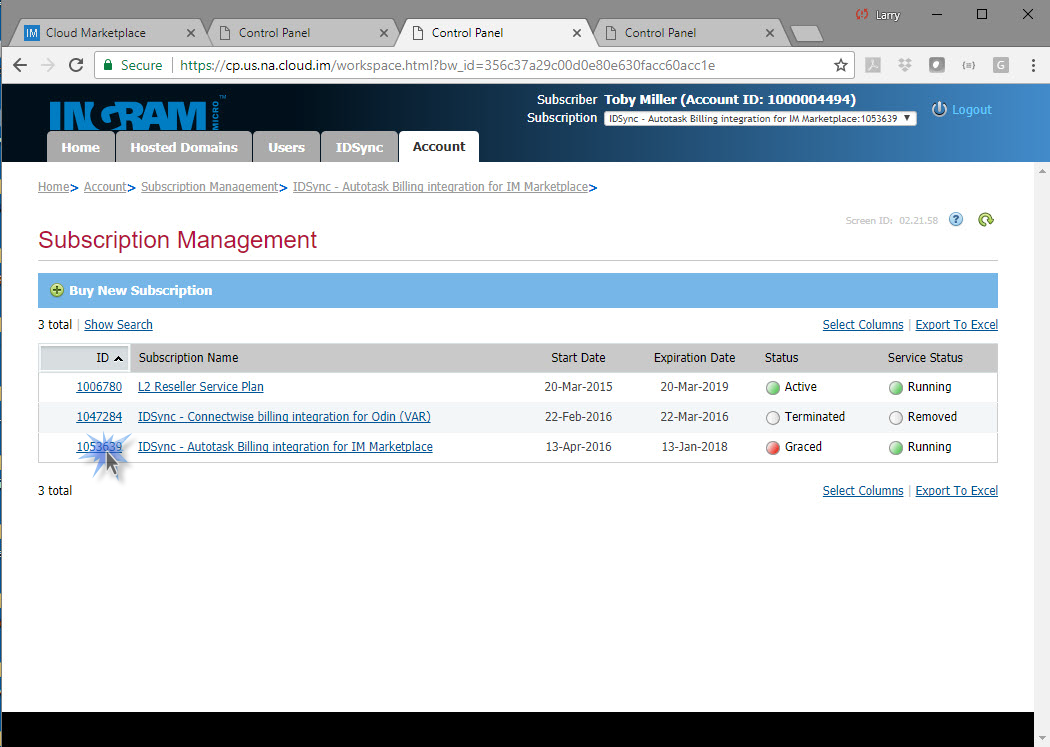
- Next select the subscription for IDSync that appears on your list of active subscriptions. It will be similar to the screen shown below:
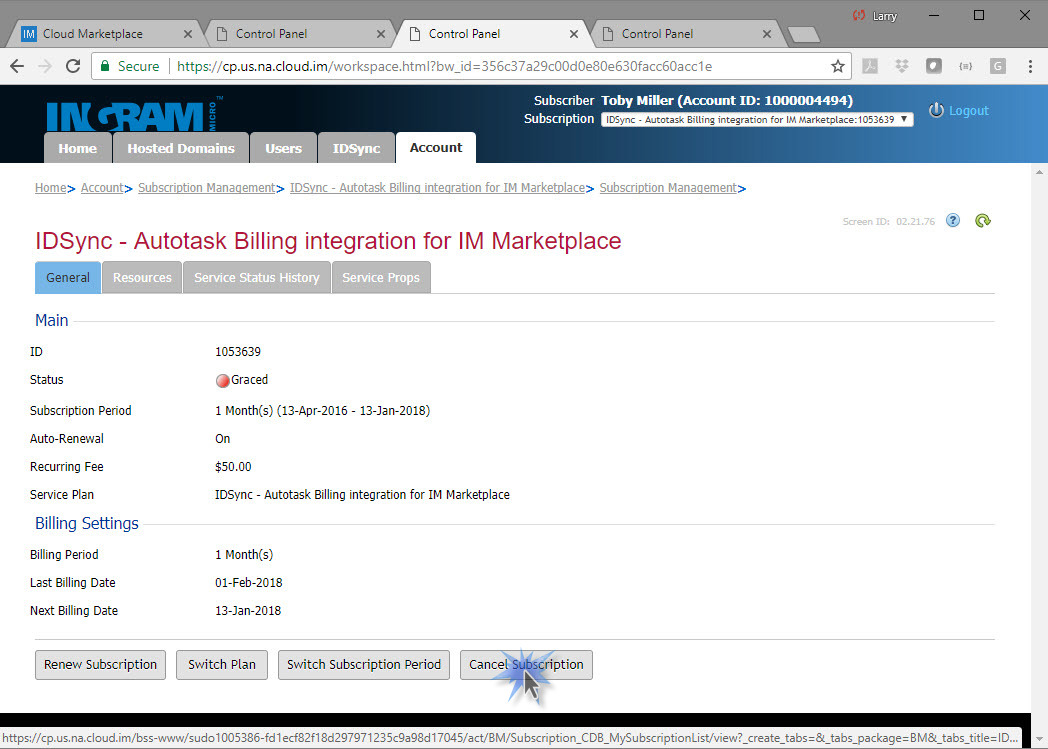
- Select the Cancel Subscription button as shown below:
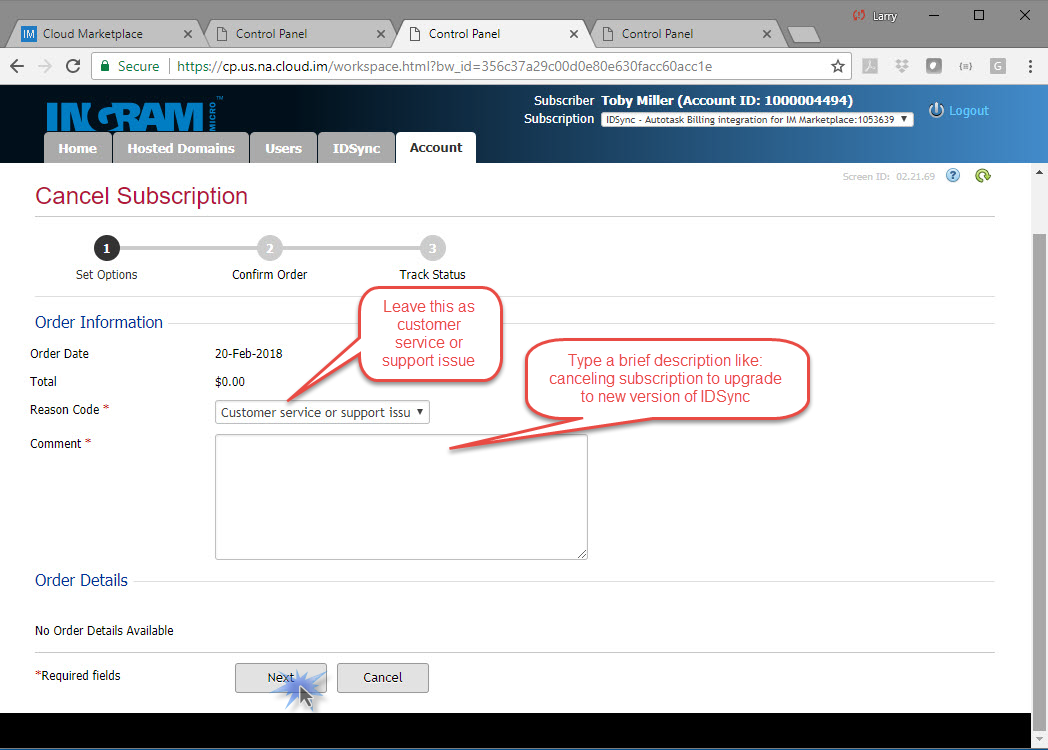
- You will be prompted for a reason and a description for the cancellation. Enter those as noted below and then click the next button:
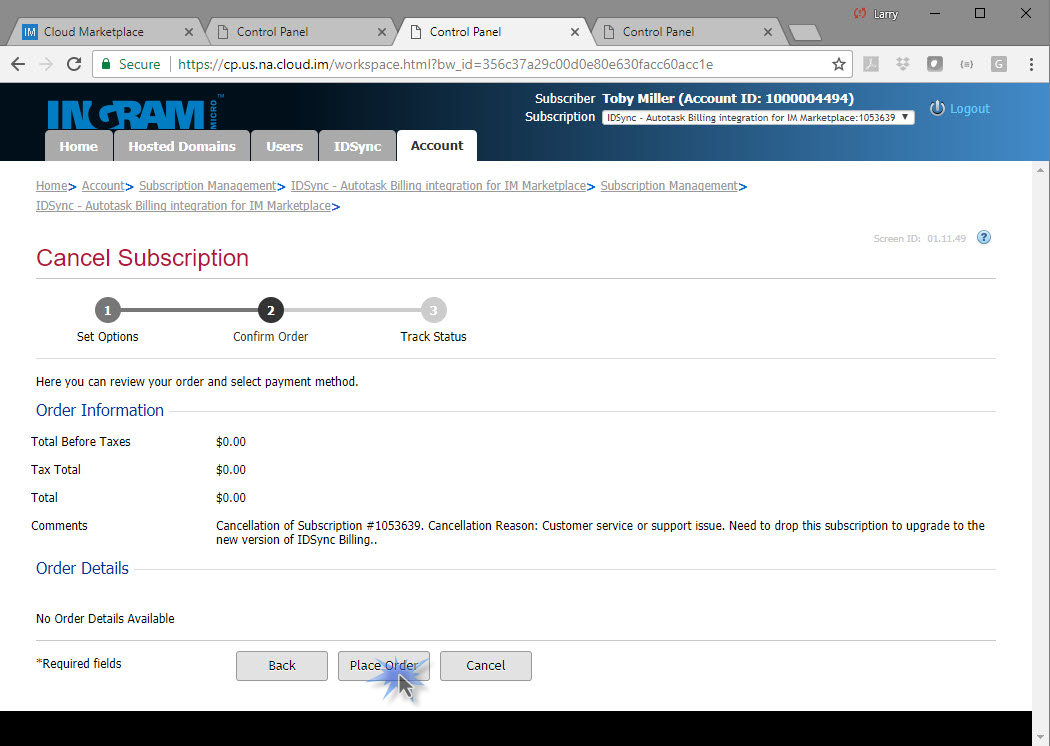
- A order summary page will display. Click the Place Order button to confirm the cancellation.
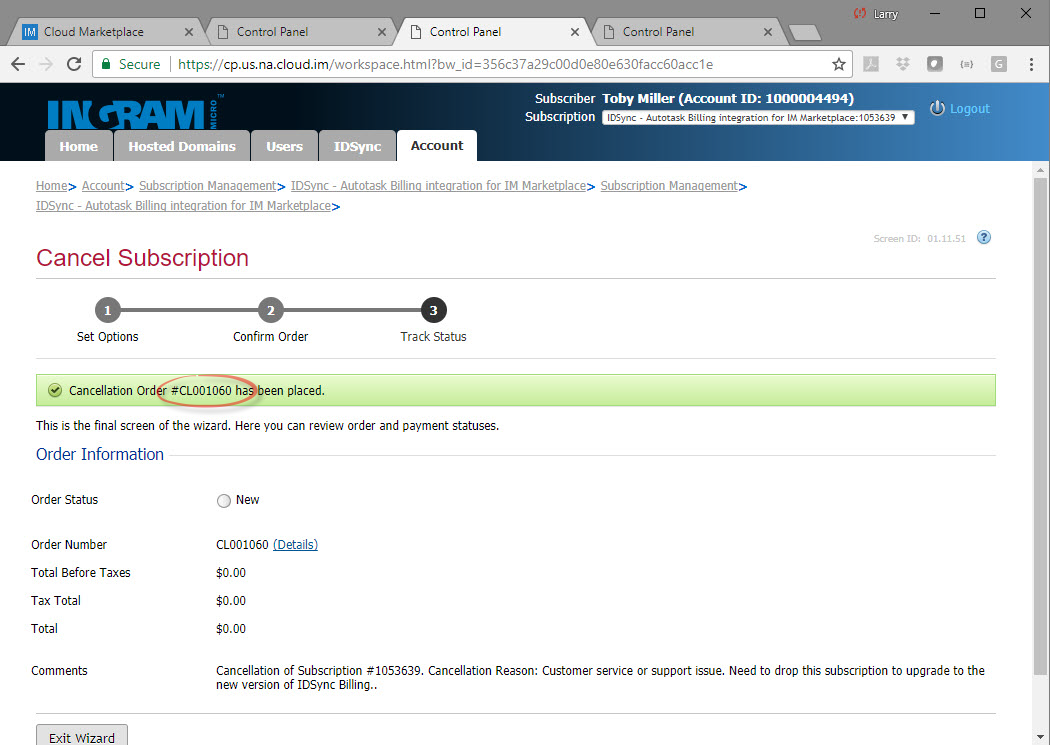
- An cancellation order number will be displayed and will appear similar to that shown below. You will need this number. It may be helpful to take a screenshot of this screen.
- The cancellation is a manual process at Ingram Micro and requires a technician to see the order and to open the order. This process does not occur immediately. So, to speed up the process, it is recommended that you contact Ingram support desk and send them the order number and a screenshot of the order and request that the support desk Open the cancellation order and terminate the subscription immediately.
- Once you have confirmation from Ingram support desk that the subscription has been cancelled, you should be able to exit the control panel and go back into the control panel within the Ingram Marketplace. The dropdown window in the top righthand corner of the screen should no longer display an IDSync subscription. An example of this dropdown with an IDSync subscription is shown below:

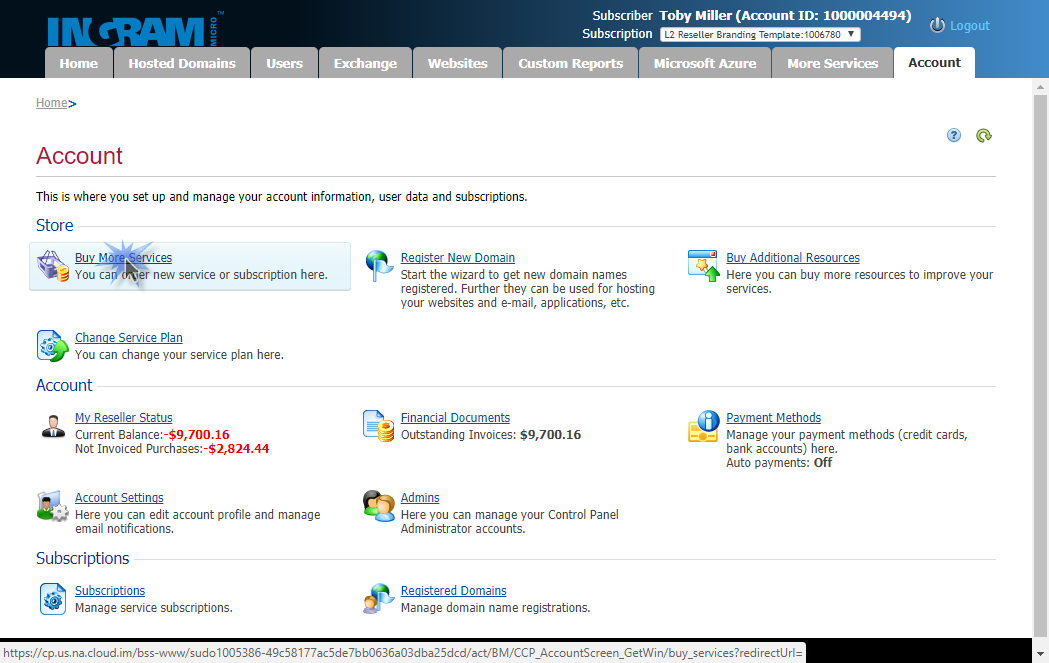
- Once the IDSync subscription no longer displays in the dropdown list, you are ready to subscribe to the new IDSync Billing package. To do so, go to the Account tab and click on the Buy More Services menu option:
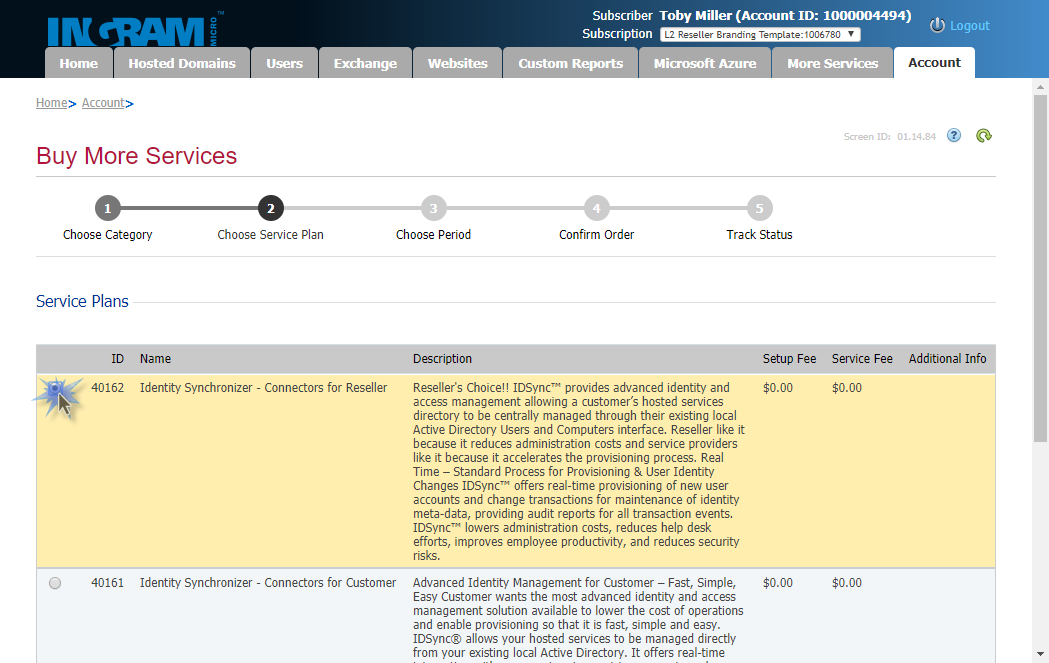
- You will be presented with a list of all of the available subscriptions from the Ingram Marketplace. Scroll down the list until you find the ID Sync Identity Syncronizer menu option. Select it as shown:
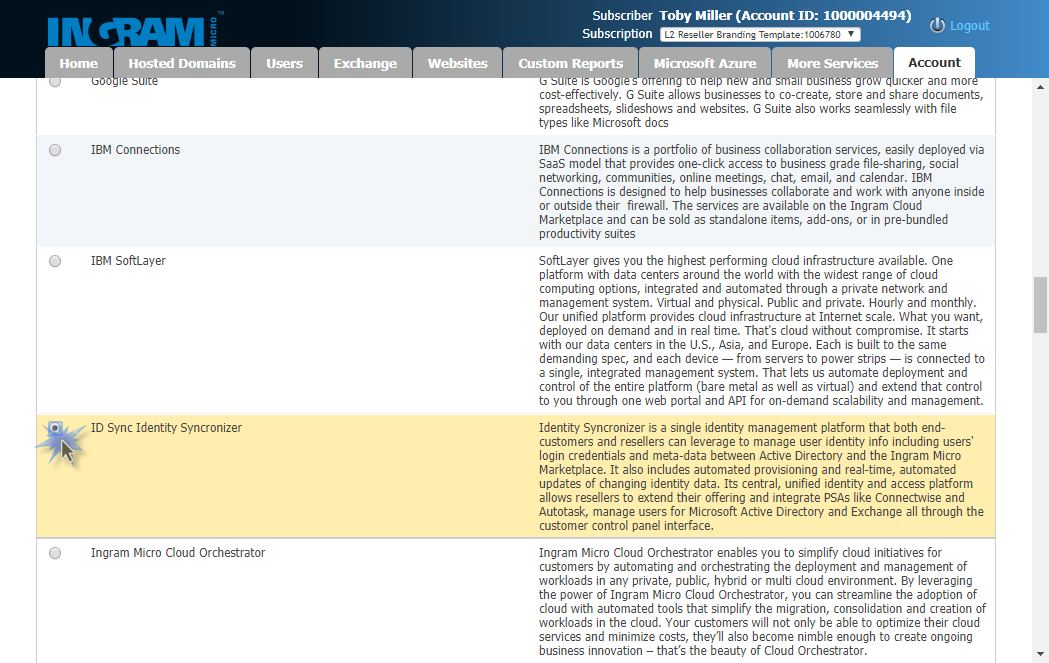
then scroll to the bottom of the page and click the Next button.
- Next you will be prompted for whether you want to purchase an IDSync connector for a reseller or for a customer. You will want the IDSync Connector for Resellers as shown:
Again, scroll down to the bottom of the page and click the Next button to continue:
- You will then be prompted to select the term for which you wish to subscribe to IDSync. Select the appropriate term and then click the Next button:

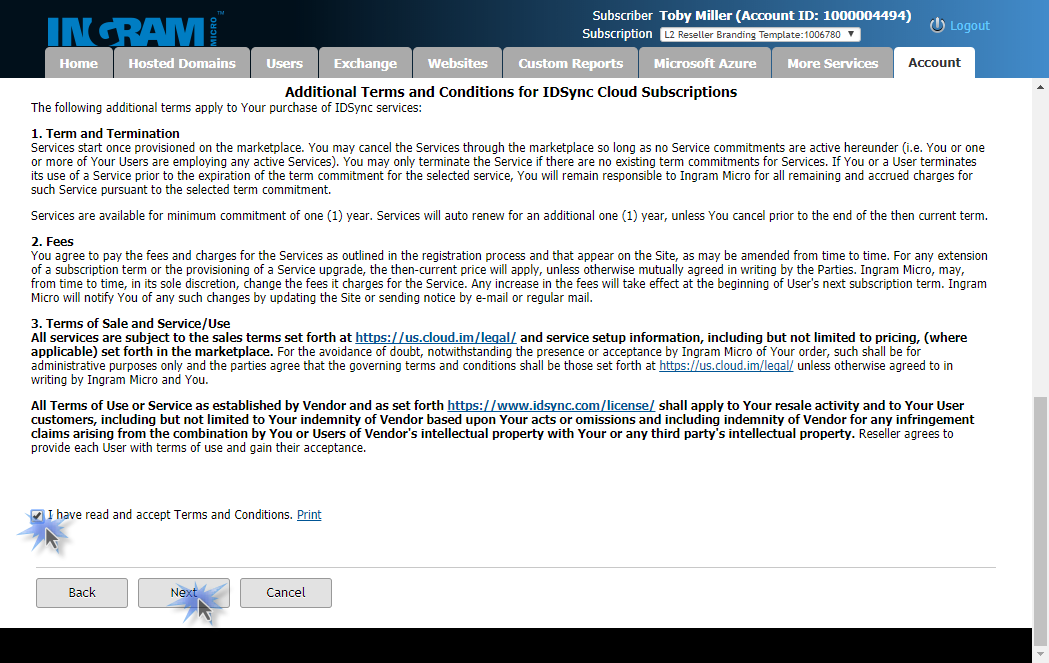
- You will be presented with a terms and conditions page. You will need to accept the Ingram Micro terms by clicking the checkbox and accept the IDSync terms by clicking a second checkbox. Then click the Next button to continue:
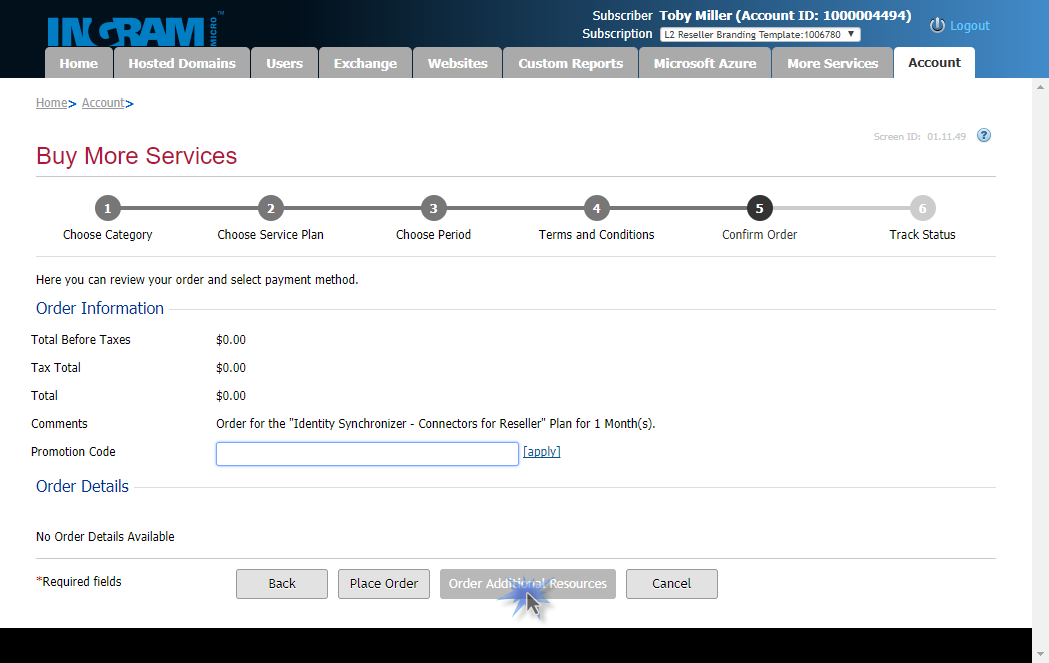
- You are almost done with the subscription change - just a few more steps. You will be presented with an order information page as shown below. Click on the Order Additional Resources tab:
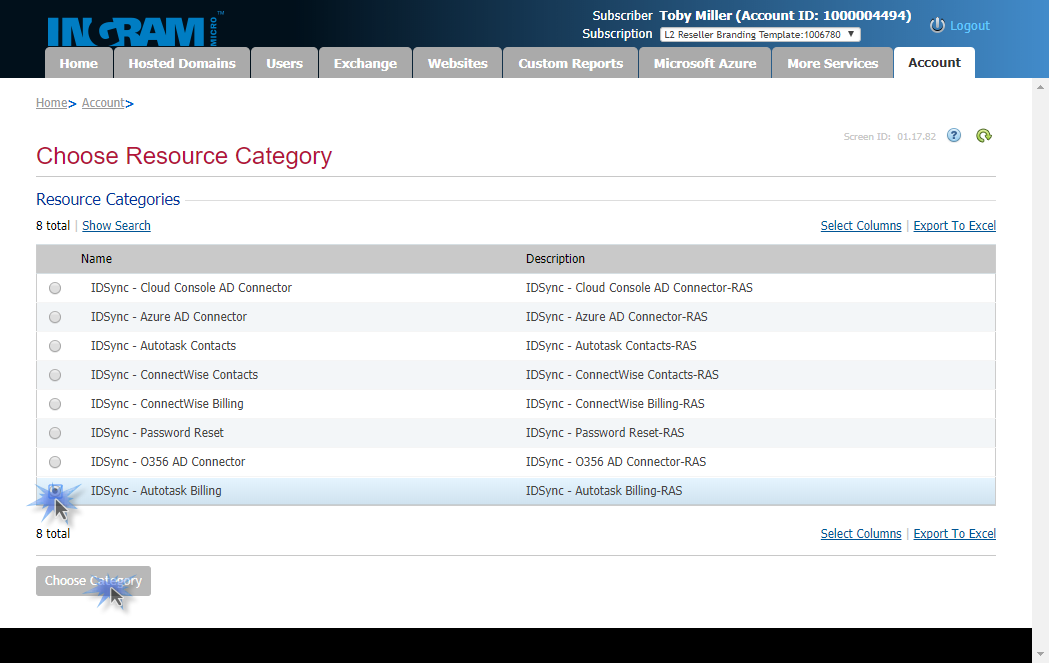
- You will be presented with a list of the different IDSync feature sets that you can subscribe to. Select the version of billing that pertains to your PSA system. So select "IDSync - Connectwise Billing" if you use Connectwise as your PSA system or select "IDSync - Autotask Billing" if you use Autotask as your PSA system. Then click the choose category button as shown below.
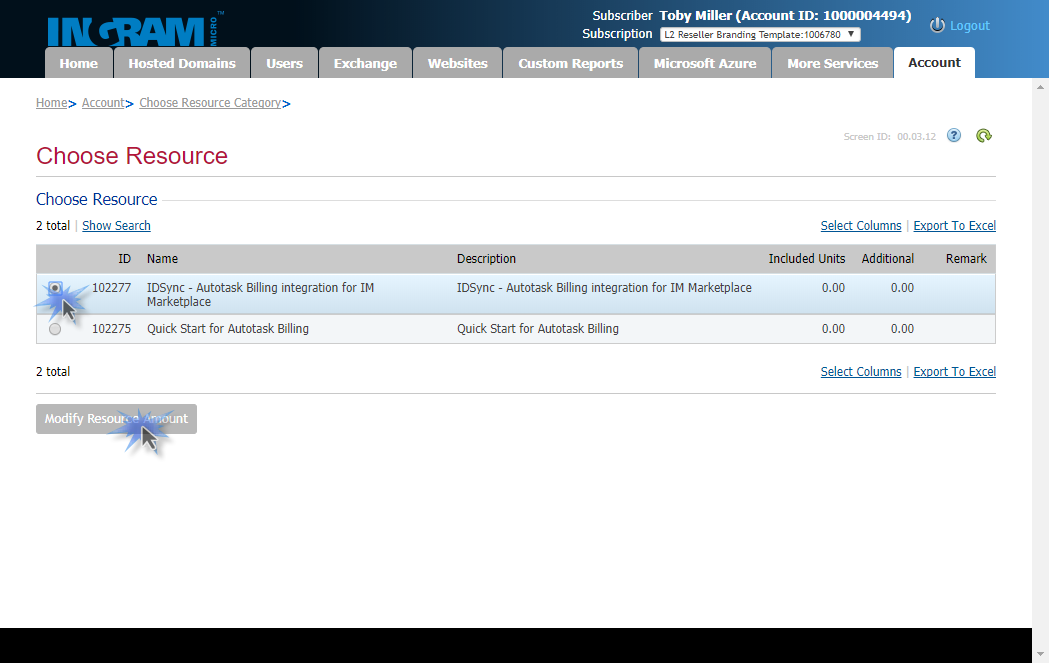
- Once you have selected the type of Billing that pertains to your PSA system, you will be presented with two options, "IDSync - (Autotask/Connectwise) Billing integration for IM Marketplace" and "Quick Start for (Autotask/Connectwise) Billing. You need to click the option that include the words "Billing integration for IM Marketplace", then click the Modify Resource Amount button as shown:
- You will then be presented with a screen where you can change the resource count. There are a bunch of blanks and checkboxes on this screen. You only need to change one blank as shown below. You need to put a number "1" in the blank for "Additional".
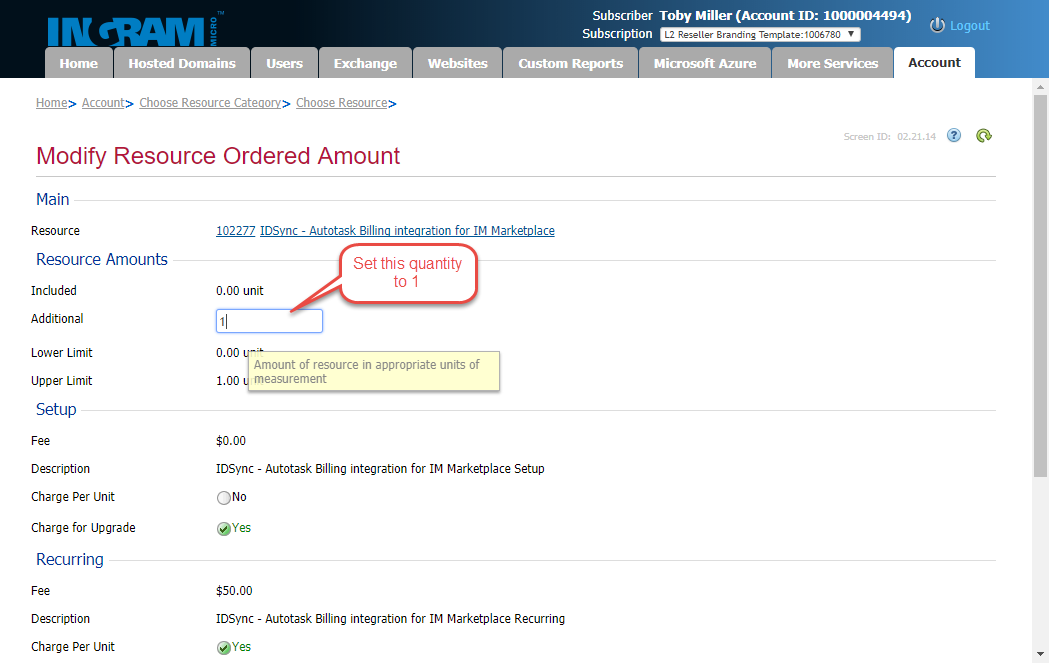
Then scroll to the bottom of the page and click the Next button to continue: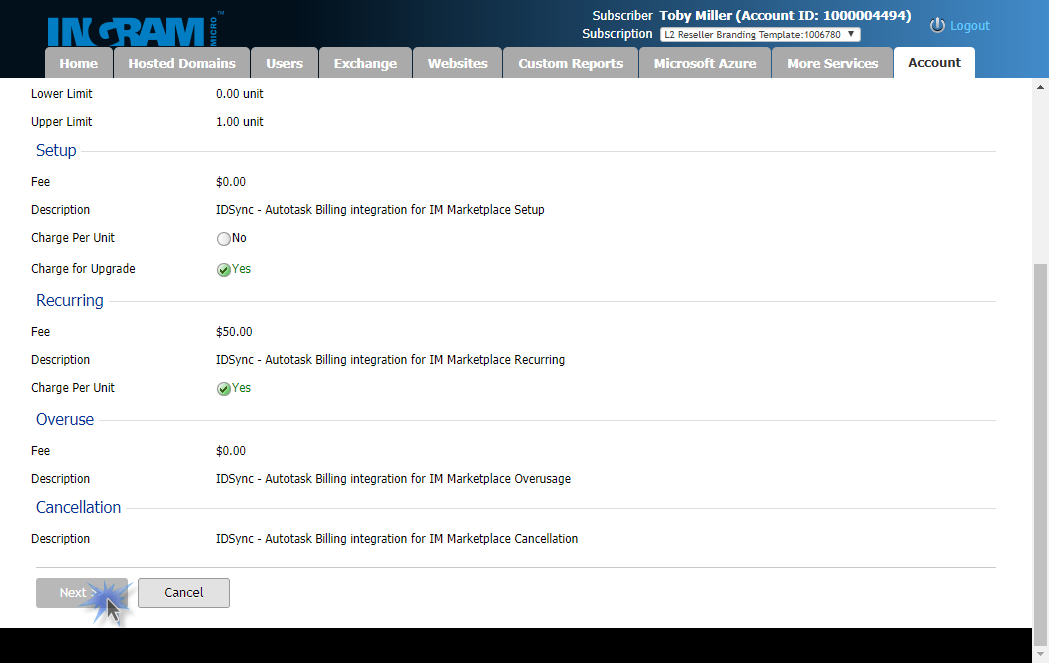
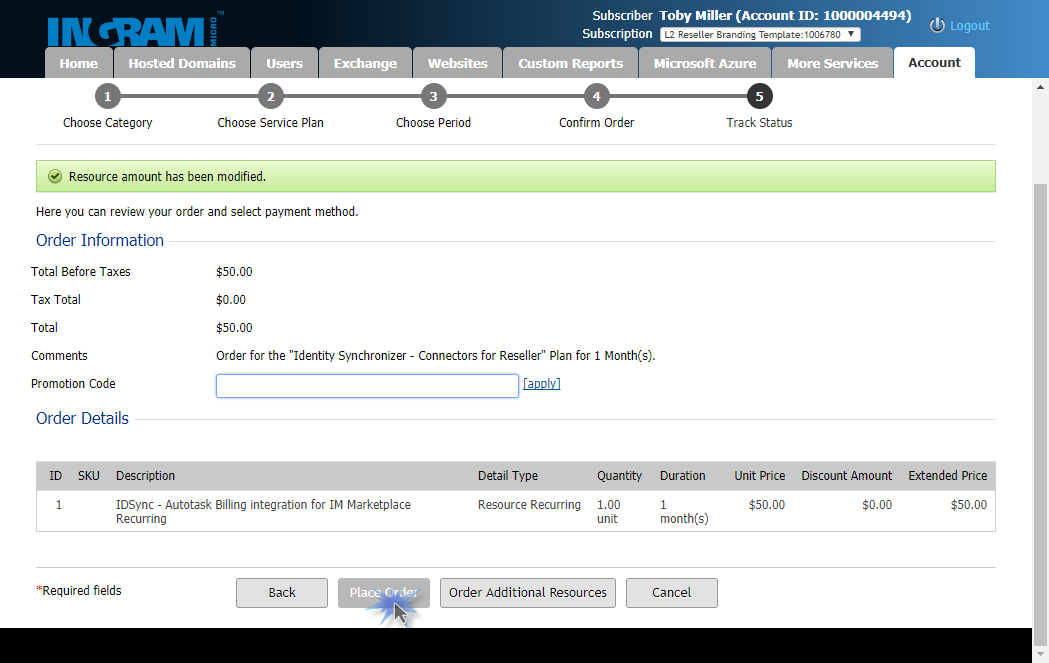
- Now you will be presented with an order summary page. Check that the item listed appears correct and that the monthly price is correct. Then click the Place Order button:
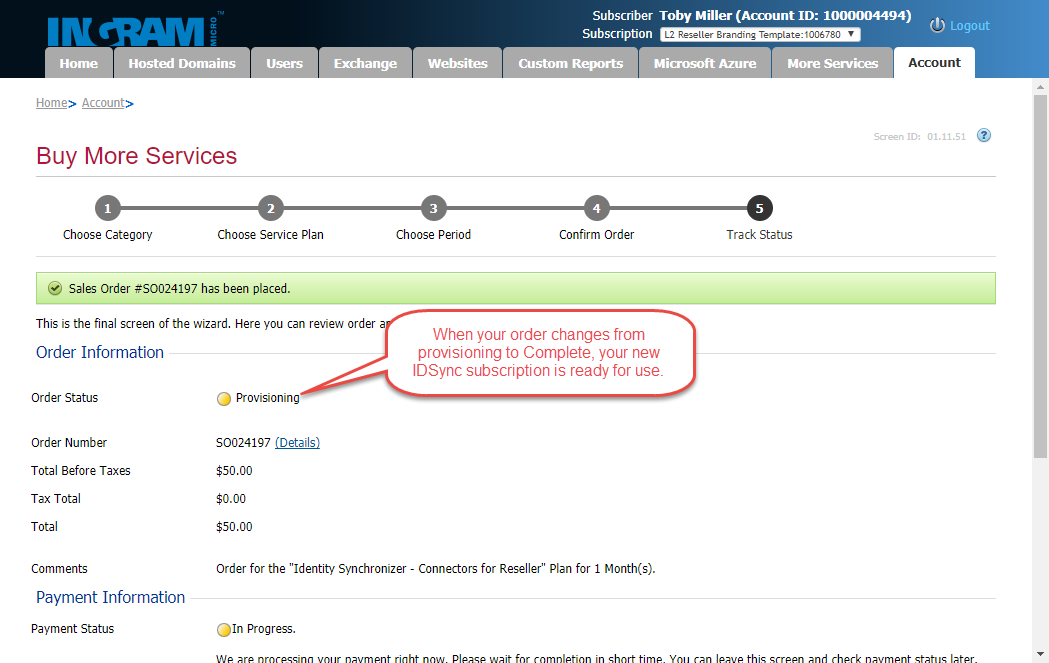
- Finally, a provisioning screen will be displayed. It will show that the subscription is being provisioned. This screen may update to eventually show you that the order in complete. Generally it take less than 10 minutes for the new IDSync subscription to be activated.
- You can check whether your new IDSync subscription is available by exiting the Control Panel and reopening control panel. The IDSync subscription should be listed in the dropdown box in the top righthand corner:

- Once you have completed these steps, you are ready to download and install the new IDSync billing software. The steps for upgrade IDSync Billing Studio are described in KB article: Upgrade the IDSync Billing Connector from 3.10 to 4.1
Related articles